
Ever stared at a forex chart and thought, “How much should I actually risk on this trade?” – you’re not alone.
That moment of uncertainty is exactly why a forex position sizing calculator exists. It takes the guesswork out of how many lots, pips, or dollars you should allocate, letting you focus on the market instead of math.
Imagine you’re a beginner who just learned about pips and leverage. You see a EUR/USD pullback, but you’re scared of blowing up your account. By plugging your account balance, risk percentage, and stop‑loss distance into the calculator, you instantly see a trade size that respects your risk tolerance.
For an intermediate trader looking to tighten consistency, the calculator becomes a quick sanity check. It reminds you that even a high‑probability setup can be oversized if you ignore proper sizing, which often leads to unexpected drawdowns.
And what about the seasoned trader who’s built a multi‑timeframe system? Even they benefit from a fast, reliable tool that adapts to changing volatility or a new risk‑reward target without manual spreadsheet gymnastics.
So, how does it actually work? You enter three basic inputs: your account equity, the percentage of that equity you’re willing to risk, and the distance (in pips) to your stop‑loss. The calculator then outputs the optimal lot size, ensuring that if the stop is hit, your loss matches the predefined risk.
One common pitfall is “risking too much on a tight stop.” The calculator flags that instantly – if the suggested lot size looks too large, you either widen the stop or reduce the risk percentage.
Another mistake is ignoring the impact of leverage. A higher leverage can inflate the lot size, but the calculator keeps the dollar risk constant, preventing you from over‑leveraging unintentionally.
Think about it this way: using the tool is like having a safety net while you walk a tightrope. You still need skill and discipline, but the net catches you if you misjudge the distance.
In practice, you’ll find yourself checking the forex position sizing calculator before every trade, treating it as a habit rather than an after‑thought. Over time, the habit reinforces sound risk management, which is the cornerstone of any sustainable trading career.
Ready to make sizing less of a mystery? Let’s dive deeper into the mechanics and see how you can integrate the calculator into your trading routine.
TL;DR
The forex position sizing calculator lets you instantly translate account balance, risk tolerance, and stop‑loss distance into the exact lot size you should trade, keeping losses aligned with your predefined risk.
By using this tool consistently, beginners avoid over‑leveraging, intermediates tighten consistency, and seasoned traders maintain disciplined risk management, turning sizing from a mystery into a reliable part of every trade.
Step 1: Understanding Position Size Basics
Ever felt that vague tug when you glance at your account balance and wonder, “How many lots should I actually trade?” You’re not alone – that gut feeling is the first sign you need a solid grip on position sizing.
At its core, position size is simply the amount of currency you commit to a trade. It’s the bridge between the abstract numbers on a chart and the real dollars (or euros) that sit in your broker account. If you can calculate it correctly, you keep losses where you expect them; if you miss it, you risk blowing up your account faster than a bad trade can recover.
Let’s break it down into three easy pieces: account equity, risk percentage, and stop‑loss distance. Think of equity as the total cash you have to play with. The risk percentage is how much of that equity you’re comfortable losing on any single trade – most educators suggest 1 % to 2 % for beginners. The stop‑loss distance is the number of pips between your entry point and the level where you’ll exit if the market moves against you.
When you feed those three numbers into a forex position sizing calculator, it spits out the exact lot size that aligns your potential loss with your chosen risk percentage. No guesswork, no spreadsheet gymnastics.
Picture this: you have €5,000 in your demo account, you decide to risk 1 % per trade, and your stop‑loss is 50 pips away. Plug those figures into the calculator and you’ll see that a 0.02‑lot trade (or 2,000 units) caps your potential loss at €50. If the calculator suggests a larger lot, you either widen the stop or dial back the risk – it’s that simple.
Why does this matter for every trader, from the newbie who just discovered leverage to the seasoned pro who runs multi‑timeframe systems? Because the math stays the same, but the stakes get higher as your account grows. Consistently applying the same risk rule prevents a string of small wins from turning into a catastrophic drawdown.
Here’s a quick checklist you can run through before you hit “Enter” on any trade:
- Confirm your account equity – include only the capital you’re willing to risk, not borrowed funds.
- Decide on a risk % – stick to a range you’re comfortable with (1‑2 % is a common sweet spot).
- Measure the stop‑loss in pips – be realistic about market volatility.
- Enter those numbers into the calculator – note the recommended lot size.
- Validate the lot size against your broker’s minimum/maximum trade size.
If any of those steps feel fuzzy, pause and recalculate. It’s better to miss a trade than to trade with the wrong size.
Another subtle point: leverage doesn’t change the risk amount, it just changes how many units you can control. A higher leverage lets you open a larger position with the same equity, but the calculator keeps the dollar risk constant, so you won’t accidentally over‑lever‑age yourself.
When you start treating the calculator as a non‑negotiable step in your workflow, you’ll notice two things. First, the anxiety around “how much should I risk?” fades. Second, you develop a disciplined habit that protects your capital during inevitable losing streaks.
So, take a moment now: pull up a forex position sizing calculator, input a sample trade, and watch the lot size appear. Feel the confidence that comes from knowing exactly how much you stand to lose before you even place the order.
Step 2: Gathering the Required Inputs
Alright, you’ve just walked through the basics of position size. Now it’s time to actually fill the three boxes that the calculator needs. If you’re staring at a blank screen, you’re probably wondering, “What exactly should I be looking for?” Let’s break it down together, step by step.
1. Confirm Your Real‑Time Account Equity
First thing’s first – pull up your broker’s dashboard and note the exact equity figure. This isn’t just the static balance you see after a weekend; it includes any open‑position profit or loss you’d be comfortable counting toward your capital. For a beginner, you might stick with the raw deposit amount, but a more seasoned trader will add unrealised gains (or subtract floating losses) to get a true picture of what’s actually at risk.
Why does this matter? Imagine you have $10,000 in the account, but a couple of trades are already down $500 each. If you ignore those losses and base your calculation on the full $10,000, you’ll unintentionally over‑risk. Adjusting for equity keeps the math honest.
2. Choose a Risk Percentage That Matches Your Plan
Next, decide what slice of that equity you’re willing to lose on a single trade. The classic wisdom in our community is 1‑2 % for most traders. That range gives you enough room to stay in the game after a string of losing trades.
Let’s look at a real‑world example. Maria, an aspiring trader from Belgrade, starts with €8,000. She opts for a 1.5 % risk level because she wants a little extra cushion while she’s still learning. That means €120 is the maximum she’ll let a losing trade eat. If she were feeling overly confident after a winning streak, she might bump it to 2 % for that particular setup, but the rule of thumb is to stay low enough to survive the inevitable drawdowns.
3. Measure the Stop‑Loss Distance in Pips
Here’s where the market‑specific part kicks in. Open your chart, plot your entry point, and then count the pips to the level where you’d place a stop‑loss. Don’t measure from the current price – measure from the exact entry you plan to take.
For instance, you spot a EUR/GBP breakout at 0.8560 and decide a logical stop sits at 0.8520. That’s a 40‑pip distance. If you were trading a more volatile pair like GBP/JPY, you might need a wider stop – maybe 80 pips – to avoid being knocked out by normal market noise.
4. Plug the Numbers Into the Calculator
Now that you have equity, risk %, and stop‑loss pips, head over to our Forex Position Size Calculator – Free Tool. Enter the three values, hit “calculate,” and watch the lot size appear. The tool does the heavy lifting, converting those abstract numbers into a concrete position size that respects your risk tolerance.
Quick tip: after you get the result, double‑check it by hand. Multiply the suggested lot size by the pip value (you can find that in our pip‑value guide) and then by the stop‑loss distance. The product should equal the dollar amount you’re willing to lose.
5. Validate With a Mini‑Checklist
- Is the equity figure up‑to‑date?
- Did you stay within your chosen risk %?
- Does the stop‑loss reflect realistic market volatility?
- Does the calculator’s output feel comfortable, or does it look too large? If it does, consider widening the stop or lowering the risk %.
Running this checklist every time you open the calculator turns a potentially emotional decision into a disciplined routine.
6. Common Pitfalls and How to Dodge Them
Even with a solid process, traders slip up. One frequent mistake is “changing the stop after the trade is live.” If you move the stop closer, you’ve effectively increased your risk per trade – the calculator’s original output no longer applies. The fix? Re‑run the calculator with the new stop distance before you modify anything.
Another trap is forgetting to account for leverage. A higher leverage lets you control a larger position, but the risk‑percentage input in the calculator ensures your dollar risk stays constant. So, whether you’re on 1:50 or 1:200, the lot size will adjust to keep the €120 risk intact.
7. Real‑World Snapshot
Take Alex, a mid‑level trader who manages a $25,000 account. He wants to trade a USD/JPY swing with a 70‑pip stop. He sets his risk at 1 %, meaning $250 at stake. The calculator spits out a lot size of 0.28 standard lots. When Alex looks at his broker’s margin requirement, he sees that with 1:100 leverage, the margin needed is well within his limits. He proceeds, confident that even if the market spikes against him, his loss will never exceed $250.
That confidence isn’t magic; it’s the result of gathering the right inputs and trusting the math.
So, what should you do next? Grab your account snapshot, decide on a sensible risk percentage, measure that stop‑loss distance, and let the calculator do the rest. The more you repeat this loop, the more natural it becomes – and the less room there is for guesswork or emotion to creep in.
Step 3: Using the Calculator – Walkthrough Video
Now that you’ve gathered equity, risk %, and stop‑loss pips, it’s time to let the calculator do the heavy lifting. In this step we walk through the actual screen, point by point, so you can hit ‘calculate’ with confidence.
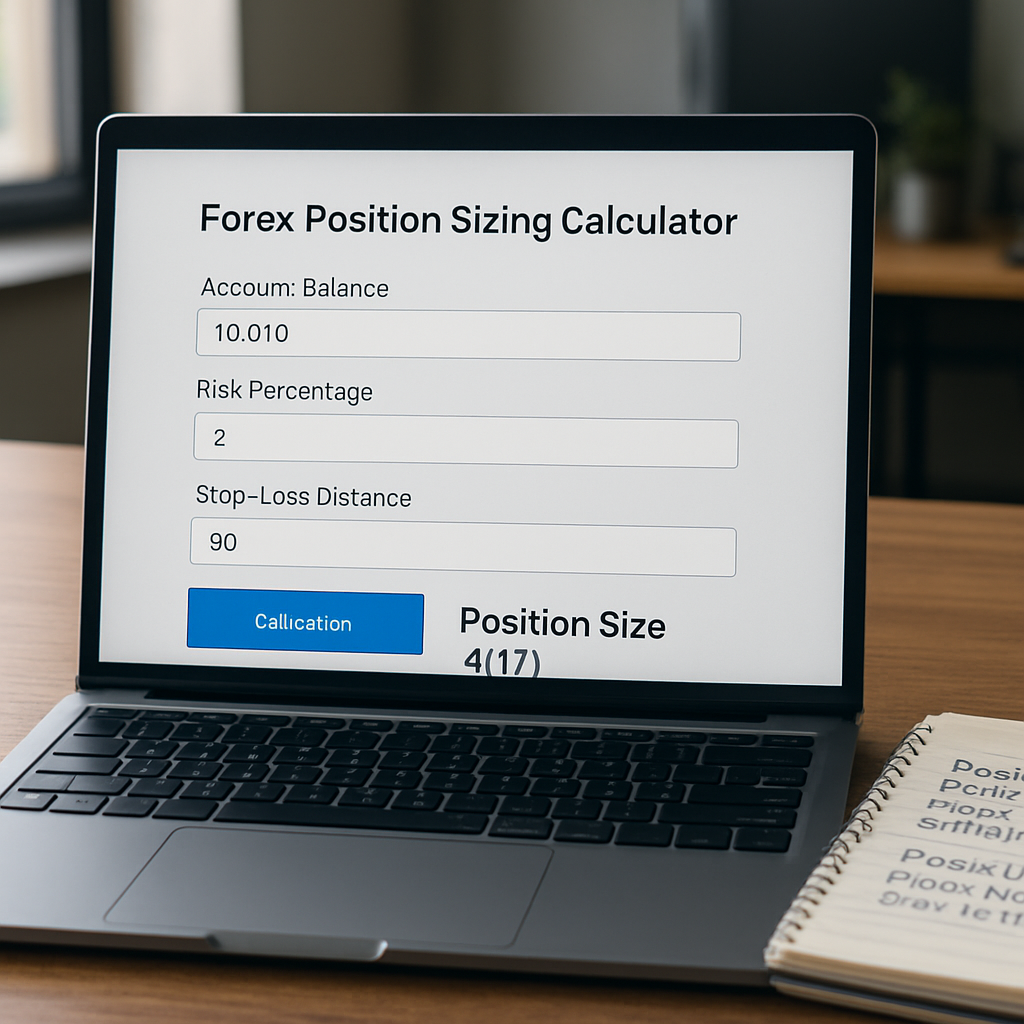
Open the forex position sizing calculator in your browser. You’ll see three input fields labelled Account Balance, Risk Percentage, and Stop‑Loss (pips). Below them the ‘Calculate’ button sits ready.
Step 1 – Paste your account balance. If you’re trading a €5,000 demo account, type 5000. Don’t forget to include any unrealised profit you’re comfortable counting as capital – that tiny adjustment can change the lot size noticeably.
Step 2 – Enter your risk percentage. Most of our readers stick to 1 % or 1.5 %. Let’s say you choose 1 %; the calculator will automatically convert that into a dollar (or euro) amount based on the balance you just entered.
Step 3 – Input the stop‑loss distance in pips. Suppose your EUR/GBP entry is 0.8560 and you plan a stop at 0.8520 – that’s a 40‑pip stop. Type 40. The tool uses the standard pip‑value formula for the selected pair, so you don’t have to do any mental math.
Once the three numbers are in place, click ‘Calculate’. Within a split‑second the tool displays the recommended lot size, the exact monetary risk, and the required margin at your chosen leverage. If the margin looks too high, you can instantly adjust the leverage dropdown and watch the numbers recalculate.
Let’s see a concrete example. Maria, a beginner with €8,000, picks a 1 % risk and a 55‑pip stop on GBP/USD. After entering 8000, 1, and 55, the calculator returns 0.12 standard lots. Multiply 0.12 × 10 = 1.2 USD per pip (GBP/USD pip value) and then × 55 pips = 66 USD, which matches her €120 risk when converted at today’s rate. The margin requirement at 1:100 leverage is only €80, well under her account size.
If you prefer a visual guide, you can watch a short walkthrough that highlights each field and shows the numbers change in real time. The video walks you through the same steps we just described, so you can pause and try it on your own screen. watch the walkthrough video.
A quick sanity check is worth the extra few seconds. Take the lot size the calculator gave you, multiply it by the pair’s pip value (found in our pip‑value guide) and then by the stop‑loss distance. The product should equal the risk amount you entered. If it doesn’t, double‑check that you used the correct number of decimal places for the pair – some brokers quote EUR/JPY to two decimal places, others to three.
Tip: Keep a small notebook next to your trading desk. Write down the three inputs, the resulting lot size, and the margin required. Over time you’ll start to recognise patterns – for a 1 % risk on major pairs you’ll often see lot sizes around 0.05‑0.15, while exotic pairs may need a smaller lot because each pip is worth more.
Another practical tip is to test the calculator with a “what‑if” scenario before you open a real trade. Change the stop‑loss from 40 pips to 80 pips and watch the lot size shrink. This demonstrates how giving the market more room can actually reduce the size of the position you need to stay within the same risk budget.
Finally, remember that the calculator is a tool, not a magic crystal ball. It guarantees that, if your stop is hit, the loss will not exceed the amount you specified. It does not guarantee that the market will move in your favour. Pair the output with solid technical analysis and a disciplined trading plan.
To make the process habit‑forming, set a reminder to run the calculator every time you add a new trade idea to your journal. Treat the calculation as the final gate before you press ‘Buy’ or ‘Sell’. In our experience, traders who consistently use the calculator see far fewer surprise drawdowns.
So, to recap: 1) Enter balance, risk %, and stop‑loss pips; 2) Click calculate; 3) Verify the lot size with a quick pip‑value check; 4) Adjust leverage or stop if the margin feels uncomfortable; 5) Record the result and move on. With these five steps you turn a potentially anxiety‑laden decision into a routine, data‑driven action.
Step 4: Interpreting Results and Adjusting Risk
You’ve run the forex position sizing calculator and a lot size is staring back at you. The next question is: what does that number really mean for your trade, and how do you tweak it if it feels off? In this step we break down the output, match it against your risk plan, and give you concrete ways to fine‑tune the numbers before you click ‘Buy’ or ‘Sell’.
Read the numbers, then read the story behind them
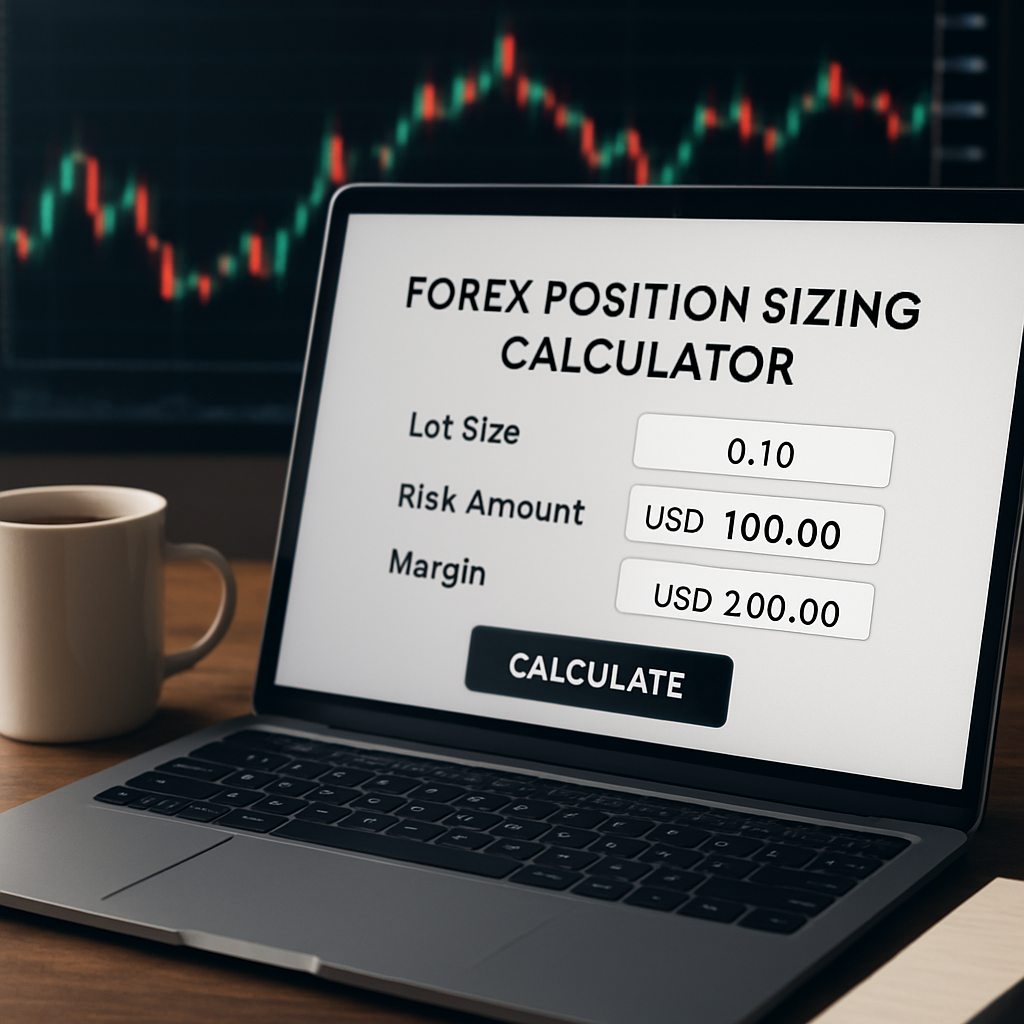
The calculator usually shows three pieces of data: the lot size, the dollar (or euro) risk, and the required margin at your chosen leverage. The lot size is the engine – it tells you how many units you’ll move when the market shifts one pip. The risk amount confirms you’re staying inside the % you entered. And the margin tells you whether your broker will even let the trade sit there.
If the margin requirement looks huge compared with your free equity, that’s a red flag. It means the position is too big for your account, even though the dollar risk is technically correct. In that case you either need to lower leverage or shrink the lot size.
Here’s a quick sanity check: multiply the lot size by the pip value for the pair, then by the stop‑loss distance. The product should equal the risk amount you fed into the calculator. If it doesn’t, you probably entered the wrong number of decimal places or chose the wrong pip value.
Adjusting risk when the lot size feels uncomfortable
Imagine you have €10,000, you risk 1 % (so €100), and the calculator suggests 0.30 standard lots on EUR/USD with a 40‑pip stop. That translates to roughly €2.50 per pip, which gives a €100 risk – perfect on paper. But maybe your broker’s margin requirement for 0.30 lots at 1:100 leverage is €1,200, leaving only €8,800 of free margin. You might feel uneasy.
Two practical ways to bring the trade back into a comfortable zone:
- Widen the stop‑loss. If you extend the stop from 40 to 60 pips, the calculator will automatically shrink the lot size to keep the €100 risk. The trade now has more room to breathe, and your margin usage drops.
- Reduce the risk percentage. Dropping from 1 % to 0.5 % halves the allowable loss, which in turn halves the suggested lot size. Your margin footprint shrinks, and the trade becomes less stressful.
Both adjustments keep the risk‑to‑reward ratio intact – you just change the numbers that feed the calculator.
When to re‑run the calculator
Markets move, and so do your inputs. If you notice the price approaching your stop, you might consider moving the stop further away to avoid a premature exit. Before you do that, re‑run the calculator with the new stop distance; otherwise you’ll be risking more than you intended.
Another common trigger is a change in account equity. Say you added €2,000 to the account after a winning streak. Plug the new balance in, keep the same risk % and stop, and you’ll see a larger lot size that still respects the original €100 risk – a natural way to scale up without over‑leveraging.
Quick decision matrix
| Scenario | Stop‑loss (pips) | Suggested lot size | Resulting risk |
|---|---|---|---|
| Baseline – 1 % risk, €10,000 equity | 40 | 0.30 standard lots | €100 |
| Wider stop – keep 1 % risk | 60 | 0.20 standard lots | €100 |
| Lower risk – keep 40‑pip stop | 40 | 0.15 standard lots | €50 |
Notice how the risk column stays fixed while the lot size shifts. That’s the magic of the calculator – it lets you play with stop distance or risk % without breaking your money‑management rules.
For a real‑world glimpse, check out a detailed explanation of why risk‑adjusted sizing matters on a reputable broker’s guide. The article walks through the same formula we use and shows how traders avoid “over‑sizing” during volatile sessions.position size calculator explained by EBC
Finally, write down three numbers after every calculation: the lot size, the risk amount, and the margin required. Keep that mini‑log in your trade journal. When you look back weeks later, you’ll see patterns – maybe you consistently needed wider stops on certain pairs, or you tend to increase risk after a win. Those insights become part of a disciplined trading system.
So, what’s the next move? Take the output, run the quick sanity check, adjust stop or risk if the lot feels too big, re‑run the calculator, and record the final figures. Treat this as the final gate before you place the order – a small pause that can save a large loss.
Remember, the calculator tells you “how much” you can risk; you decide “whether” the trade aligns with your strategy.
Ready to lock in a risk‑aware position? Grab your screen, follow the steps, and let the numbers do the heavy lifting.
Step 5: Integrating the Calculator into a Trading Plan
Alright, you’ve run the forex position sizing calculator and you have a lot size in front of you. The next question is: how does that number live inside the bigger picture of your trading plan?
Why the calculator belongs in the plan, not as a one‑off tool
Think of a trading plan as a roadmap. The calculator is just the mileage gauge – it tells you how far you can go before you run out of fuel. Without a roadmap, you might drive in circles, even if you never run out of gas.
In our experience, the most common mistake is to treat the lot size as the final decision. You’ve seen that in the previous steps – the numbers are only as good as the context you give them.
Step‑by‑step: stitching the output into your routine
1. Log the calculation. Open your trade journal (digital or paper) and record three fields: the account equity you used, the risk % you entered, and the stop‑loss distance. Then write down the lot size the calculator spit out.
2. Match it to your strategy. Does the suggested lot fit the pattern you’ve defined for that setup? For example, if you trade EUR/USD on a 30‑pip stop and your plan says “use mini‑lots for breakout entries,” verify that the calculator’s output aligns – maybe it suggests 0.12 standard lots, which translates to 1.2 mini‑lots. If that feels too large, you know you need to adjust.
3. Run a quick sanity check. Multiply the lot size by the pip value for the pair, then by the stop‑loss distance. The product should equal the dollar (or euro) risk you entered. If it’s off, double‑check the decimal places or the pair’s quote convention.
4. Adjust the stop or risk if needed. Here’s a real‑world snapshot: Alex has a $15,000 account, risks 1 % ($150), and sees a GBP/JPY swing with a 70‑pip stop. The calculator returns 0.25 standard lots. That lot size looks comfortable, but Alex notices the margin requirement at his 1:100 leverage is $2,200 – a hefty chunk of free equity. He can either widen the stop to 100 pips (which drops the lot to ~0.18) or reduce risk to 0.5 % ($75), which also cuts the lot size. Both keep the risk at $150 or less while freeing up margin.
5. Embed the lot size into your order ticket. When you open the trade, paste the exact lot size into the broker’s order window. Some platforms let you save a template; use it to avoid manual entry errors.
6. Set conditional alerts. Many traders add a price‑alert at the stop‑loss level. If the market approaches that point, they re‑run the calculator with the new stop distance before moving the stop. This prevents accidental “risk creep.”
Integrating with risk‑management checkpoints
Every trading plan should have at least three risk checkpoints:
- Pre‑trade: calculator run, journal entry, sanity check.
- In‑trade: margin watch, stop‑loss proximity alert, optional re‑calc if market volatility spikes.
- Post‑trade: record actual outcome, compare realized risk vs. calculated risk, note any deviations.
When you close a trade, note whether the loss (or profit) matched the calculated risk. Over time you’ll see patterns – perhaps you consistently over‑size on high‑volatility news events. Those insights become part of a refined plan.
Practical tip: a “plan‑pause” checklist
Before you hit “Buy” or “Sell,” run through this quick list:
- Is the lot size from the calculator realistic for my margin?
- Does the stop‑loss respect the volatility of the pair?
- Have I recorded the three input numbers and the resulting lot?
- Did I double‑check the pip‑value multiplication?
- Am I comfortable with the potential loss – can I sleep tonight?
If any answer is “no,” go back, tweak the stop or risk, and recalc.
Embedding the calculator in a weekly routine
Many traders schedule a “position‑sizing review” every Monday. They pull the latest account equity, update any new risk‑percentage adjustments (maybe after a win streak), and run the calculator for the week’s trade ideas. This habit turns a sporadic task into a disciplined part of the plan.
For aspiring traders, this routine builds confidence. For seasoned traders, it adds a layer of institutional‑grade rigor – the same principle that professional desks use to keep risk in check.
What to do when the calculator says “too big”
If the output suggests a lot that feels uncomfortable, you have three levers:
- Widen the stop. More room for the market reduces the lot.
- Lower the risk %. Halve the risk, halve the lot.
- Adjust leverage. Reducing leverage can shrink the required margin, making a larger lot more feasible, but remember the risk amount stays the same.
Choose the option that aligns best with your strategy’s edge. If you’re trading a high‑probability breakout, a wider stop might be acceptable. If you’re in a volatile news window, cutting risk is usually wiser.
Bringing it all together
Integrating the forex position sizing calculator into a trading plan is less about the math and more about the process. The calculator gives you a precise lot size; your plan tells you when that lot size is appropriate, how to verify it, and what to do if it doesn’t fit.
So, next time you spot a setup, remember the flow: gather inputs → run the calculator → log the result → match it to your plan → double‑check → place the trade → monitor and record. Treat each step like a small safety net, and you’ll keep risk under control while still chasing the market’s opportunities.
Conclusion
We’ve walked through every step of turning raw account numbers into a concrete lot size, and you now know why the forex position sizing calculator is more than a neat gadget—it’s a safety net.
Remember the three inputs: equity, risk %, and stop‑loss pips. Plug them in, double‑check the pip‑value math, and you’ll see the exact amount you can afford to lose on each trade.
If the output feels too big, you have three simple levers: widen the stop, lower the risk percentage, or adjust leverage. Those tweaks keep the risk number steady while making the trade feel comfortable.
What’s the next move? Grab your latest account snapshot, run the calculator one more time, and write the lot size into your trade journal before you hit “Buy” or “Sell.” That tiny pause can mean the difference between a disciplined trade and an accidental over‑exposure.
In our experience, traders who treat the calculator as a routine checkpoint stay in the game longer and avoid surprise drawdowns. So, make the forex position sizing calculator part of every trade plan, and let the numbers do the heavy lifting for you.
Start today, and watch your risk management become second nature as you grow as a trader.
FAQ
How does a forex position sizing calculator actually work?
At its core the tool takes three numbers – your account equity, the percentage of that equity you’re willing to risk, and the distance of your stop‑loss in pips. It then multiplies the risk amount by the pip value for the selected pair and divides by the stop distance. The result is the lot size that will keep your dollar loss exactly at the risk you set.
What inputs do I need to feed into the calculator?
You’ll need (1) the exact equity shown on your broker’s platform – include any unrealised profit or loss you’re comfortable counting, (2) a risk percentage, typically 1 % to 2 % for most traders, and (3) the number of pips between your intended entry price and the stop‑loss level. Those three values are enough for the calculator to spit out a precise lot size.
Can I use the calculator on different currency pairs with varying pip values?
Absolutely. The calculator automatically pulls the standard pip value for the pair you select – for most majors it’s 0.0001, but for JPY‑crosses it’s 0.01. Because the pip value is built into the formula, you don’t have to do any extra math. Just pick the pair, enter your three inputs, and the tool will adjust the lot size to reflect the correct pip‑worth.
How often should I recalculate my lot size?
Any time one of the three inputs changes. A deposit, a loss that shrinks your equity, a new risk‑percentage decision, or a revised stop‑loss distance all require a fresh run. We recommend making it a habit before every new trade idea – pull the latest equity figure, confirm your stop, hit calculate, and you’ll stay aligned with your risk plan.
What if my broker offers different leverage—does that affect the calculator?
Leverage doesn’t change the risk calculation because the tool works in dollar (or euro) terms, not margin. What it does affect is the amount of free margin you need to open the suggested lot. If the required margin looks too high, you can either lower the lot size by widening the stop or reducing your risk percentage, keeping the same dollar risk.
Is the calculator reliable for both demo and live accounts?
Yes. The math behind the calculator is the same regardless of account type – it only needs the equity number you feed it. In a demo environment you might have a perfect data feed, while a live account could include spreads or slippage. Those factors don’t alter the lot‑size formula, but they’re worth remembering when you test the trade.
What are common mistakes traders make when interpreting the calculator’s output?
One big slip is assuming the lot size is “the final decision” and ignoring the margin requirement. Another is moving the stop after the trade is live without re‑running the calculator – that instantly raises the dollar risk. Finally, some traders forget to adjust the pip value for JPY pairs, which can double the risk if left unchecked.
[…] how do you translate that percentage into a concrete lot size? That’s where a Forex Position Sizing Calculator: A Complete Educational Guide becomes indispensable. Plug in your account equity, stop‑loss distance in pips, and the […]
[…] traders use a spreadsheet or a calculator to avoid manual errors. Our own Forex Position Sizing Calculator: A Complete Educational Guide walks you through each field and shows a live example, so you can see the exact lot size for a […]