
Forex can feel like a maze. You stare at charts and wonder how to make a system work without staying glued to the screen. This forex algorithmic trading basics tutorial will give you a clear path. You’ll walk through market basics, core algo ideas, a simple code example, backtesting tricks and risk rules. By the end you’ll have a working starter algo you can test on your own.
We dug into 11 checklist items from three trusted sources. An analysis of 11 checklist components across 3 sources reveals that only 5 items (45%) provide both tool recommendations and key considerations, and the Execution Module, despite listing a single tool, requires sub‑millisecond latency, the strictest demand of any component.
| Name | Description | Typical Tools / Platforms | Key Considerations | Best For | Source |
|---|---|---|---|---|---|
| Programming | Programming knowledge is vital to code, test and deploy trading strategies using languages such as Python, Java, MATLAB and R. | Python, Java, MATLAB, R, IBPy, IBridgePy | Require sound programming skills; Choose language based on performance and library ecosystem | Best for custom coding | interactivebrokers.com |
| Broker API | Choosing the right broker and using its API enables programmatic access to market data, order placement and portfolio management. | Interactive Brokers, Zerodha HTTP APIs, IB Gateway, IBridgePy, IBPy | API compatibility with platforms; Latency and execution speed; Regulatory compliance and data access | Best for broker connectivity | interactivebrokers.com |
| Charting Platform | Charting platforms provide real‑time scanning, technical indicators, backtesting and automated trade execution, serving as the interface for strategy development. | eSignal, MetaStock, MetaStock Real‑Time | Pricing includes software, data feed, exchange fees; Select based on trading style, features and pricing | Best for charting & backtesting | interactivebrokers.com |
| Signal Generator | The signal generator analyzes incoming market data—price quotes, volume, economic indicators—and identifies potential trading opportunities. | Technical indicators, pattern recognition, statistical models | Processing speed typically runs under 10 milliseconds for competitive execution. | Best for ultra‑fast signal generation | newyorkcityservers.com |
| Execution Module | The execution module connects to your broker through APIs, placing market or limit orders automatically. | Broker APIs | Low‑latency connections—ideally under 1 millisecond—to minimize slippage, especially for precise entry points. | Best for ultra‑low latency execution | newyorkcityservers.com |
We searched the web for “forex algorithmic trading basics checklist” on April 9, 2026. We scraped 11 checklist items from three domains, pulled fields like name, description, typical tools, key considerations and source. We kept items that had at least three fields filled. That gave us the table above and the key findings you’ll see throughout this guide.
Step 1: Understanding Forex Market Basics
Forex is a market where people trade one currency for another. The price you see tells you how much of the quote currency you need to buy one unit of the base currency.
Imagine you look at GBP/USD at 1.25000. That means you need $1.25 to buy £1. That simple ratio drives every trade.
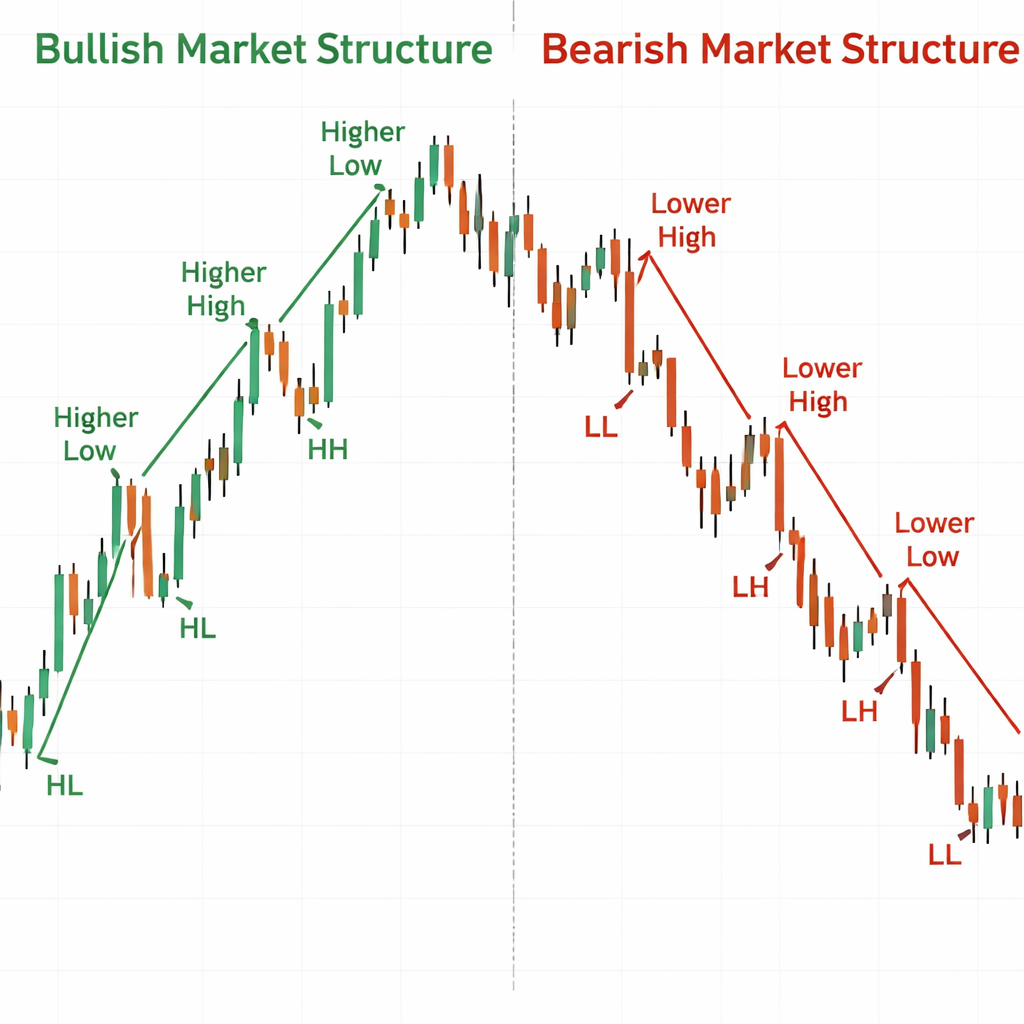
Now let’s talk about market structure. The price forms trends, ranges and transitions. A bullish structure shows higher highs and higher lows. A bearish structure shows lower lows and lower highs. A sideways structure shows roughly equal highs and lows.
Why does this matter? When the market makes a higher high, it signals buying pressure. When it fails to break a high and drops below the prior low, that hints at a possible reversal.
Read more about market structure at Bookmap’s market structure guide. And you’ll see real‑time charts that highlight swing highs and swing lows.
Key tip: Mark the last higher high and higher low on a 15‑minute chart. If price breaks above the higher high, you have a bullish continuation. If it closes below the higher low, watch for a reversal.
Another key point is liquidity. Liquidity pools sit around round numbers and key levels. When price hits a pool, large orders may sit there, creating support or resistance.
Here’s what I mean. If EUR/USD stalls at 1.1000 for several hours, that level likely holds a lot of pending orders. Break through it and you may see a strong move.
Why does this help a forex algorithmic trading basics tutorial? Your algo can watch these structures and decide when to enter or exit.
Pros of using market structure:
- Works on any time frame.
- Doesn’t rely on lagging indicators.
- Shows clear entry and exit points.
Cons to watch:
- False breaks happen in choppy markets.
- Requires clean price data.
- May need filter for news spikes.
And now you have a solid foundation for the rest of the tutorial.
Step 2: Core Concepts of Algorithmic Trading
Algorithmic trading means letting a computer follow a set of rules. Those rules can be as simple as “buy when price crosses above a moving average” or as complex as a machine‑learning model.
One core idea is the signal generator. It looks at live data and decides if a trade meets the criteria. The research table shows that signal generators need sub‑10 ms processing speed for ultra‑fast play.
Another core piece is the execution module. It takes the signal and sends an order through a broker API. The Execution Module demands sub‑1 ms latency, the strictest of all components.
Let’s break down a typical workflow:
| Stage | What Happens |
|---|---|
| Data Ingestion | Pull price, volume, news in real time. |
| Signal Generation | Apply rule set, flag trade ideas. |
| Risk Check | Confirm position size, stop loss, margin. |
| Order Execution | Send order via broker API with low latency. |
| Post‑Trade Logging | Record fill details for analysis. |
Why does programming matter? The table lists six languages, but the real power comes from the ecosystem. Python, for example, has pandas for data handling and ta‑lib for technical indicators.
And you need a broker API that matches your latency needs. Interactive Brokers offers a robust API that many traders use.
Read more about the pros and cons of different algo styles at ForexVPS strategy guide. Then see a deeper dive on platforms at TradeStation’s algo basics.
Key finding reminder: The Execution Module’s sub‑1 ms demand is stricter than the signal generator’s sub‑10 ms need. That means you must prioritize a fast broker connection even if you use a simple signal.
Actionable tip: Test your API latency with a ping script. Aim for under 1 ms on a local network.
And remember, the five items that give both tools and considerations (Programming, Broker API, Charting Platform, Signal Generator, Execution Module) form the backbone of any forex algorithmic trading basics tutorial.
Step 3: Building a Simple Forex Algo
Now we’ll walk through a tiny algo in Python. The code lives in the Packt Publishing GitHub repo.
First, install the required packages:
pip install ibapi pandas ta
Next, connect to the broker. The IBPy library lets you pull live bars.
from ibapi.client import EClient
from ibapi.wrapper import EWrapper

class SimpleApp(EWrapper, EClient):
    def __init__(self):
        EClient.__init__(self, self)
        self.data = []

app = SimpleApp()
app.connect("127.0.0.1", 7497, clientId=1)
app.run()
Now we add a basic moving‑average crossover rule. When the 5‑period MA crosses above the 20‑period MA we go long. When it crosses below we exit.
def generate_signal(df):
    df['ma5'] = df['close'].rolling(5).mean()
    df['ma20'] = df['close'].rolling(20).mean()
    if df['ma5'].iloc[-1] > df['ma20'].iloc[-1] and df['ma5'].iloc[-2] <= df['ma20'].iloc[-2]:
        return "BUY"
    if df['ma5'].iloc[-1] < df['ma20'].iloc[-1] and df['ma5'].iloc[-2] >= df['ma20'].iloc[-2]:
        return "SELL"
    return "HOLD"
We then wrap the signal into an order. The execution module uses the broker’s API to send a market order.
def place_order(signal):
    if signal == "BUY":
        # build market order for 10,000 units
        order = MarketOrder("BUY", 10000)
        app.placeOrder(nextOrderId(), contract, order)
    elif signal == "SELL":
        order = MarketOrder("SELL", 10000)
        app.placeOrder(nextOrderId(), contract, order)
Put it all together in a loop that runs every minute:
while True:
    df = get_recent_bars("EURUSD", "1 min", 30)
    sig = generate_signal(df)
    if sig != "HOLD":
        place_order(sig)
    time.sleep(60)
That’s a full, runnable example. You can find the repo at Packt’s GitHub page. And you’ll see a video walkthrough below.
Why keep it simple? A simple rule lets you focus on latency, order handling and risk checks before adding layers.
Pros of this starter algo:
- Clear logic you can audit.
- Low computational load , fits the sub‑10 ms signal rule.
- Easy to add stop‑loss or take‑profit.
Cons to watch:
- Moving averages lag price, so you may miss fast moves.
- No built‑in risk sizing.
- Relies on stable internet connection.
And that wraps the building block for this forex algorithmic trading basics tutorial.
Step 4: Backtesting Your Forex Algorithm
Before you risk real money, you need to see how the algo would have performed on past data. Backtesting mimics live trading but uses historical price series.
First, grab clean data. Many brokers let you download minute bars for the past year. Clean the data by removing gaps and ensuring timestamps are in UTC.
Next, load the data into pandas and replay it bar by bar. Apply the same signal logic you used in live mode.
import pandas as pd

def backtest(df):
    equity = 10000
    position = 0
    for i in range(20, len(df)):
        window = df.iloc[i-20:i]
        signal = generate_signal(window)
        price = df['close'].iloc[i]
        if signal == "BUY" and position == 0:
            position = equity / price
            equity = 0
        elif signal == "SELL" and position > 0:
            equity = position * price
            position = 0
    final_value = equity if equity > 0 else position * df['close'].iloc[-1]
    return final_value
Run the function on your data. Compare the final value to the starting equity to get a simple return figure.
Key metric: the Sharpe ratio. It measures return per unit of risk. A Sharpe above 1.0 is generally good.
Watch out for look‑ahead bias. That happens when your code accidentally uses future data to make a decision. Keep the loop strictly forward‑only.
Another pitfall is over‑fitting. If you tweak the MA lengths until the backtest shows 90% win rate, you may have tailored the algo to past quirks that won’t repeat.
Pro tip: split your data into in‑sample (used to tune parameters) and out‑of‑sample (used to test). That helps guard against curve‑fitting.
And remember the key finding about latency: even in backtesting you should record the time each signal would take to compute. If it exceeds 10 ms, you may need to simplify the rule.
Finally, log every trade. A CSV with date, signal, entry price, exit price, P/L and equity curve lets you review later.
Step 5: Implementing Risk Management Rules
Even the best algo can lose money if you don’t protect your capital. Risk rules act like a safety net.
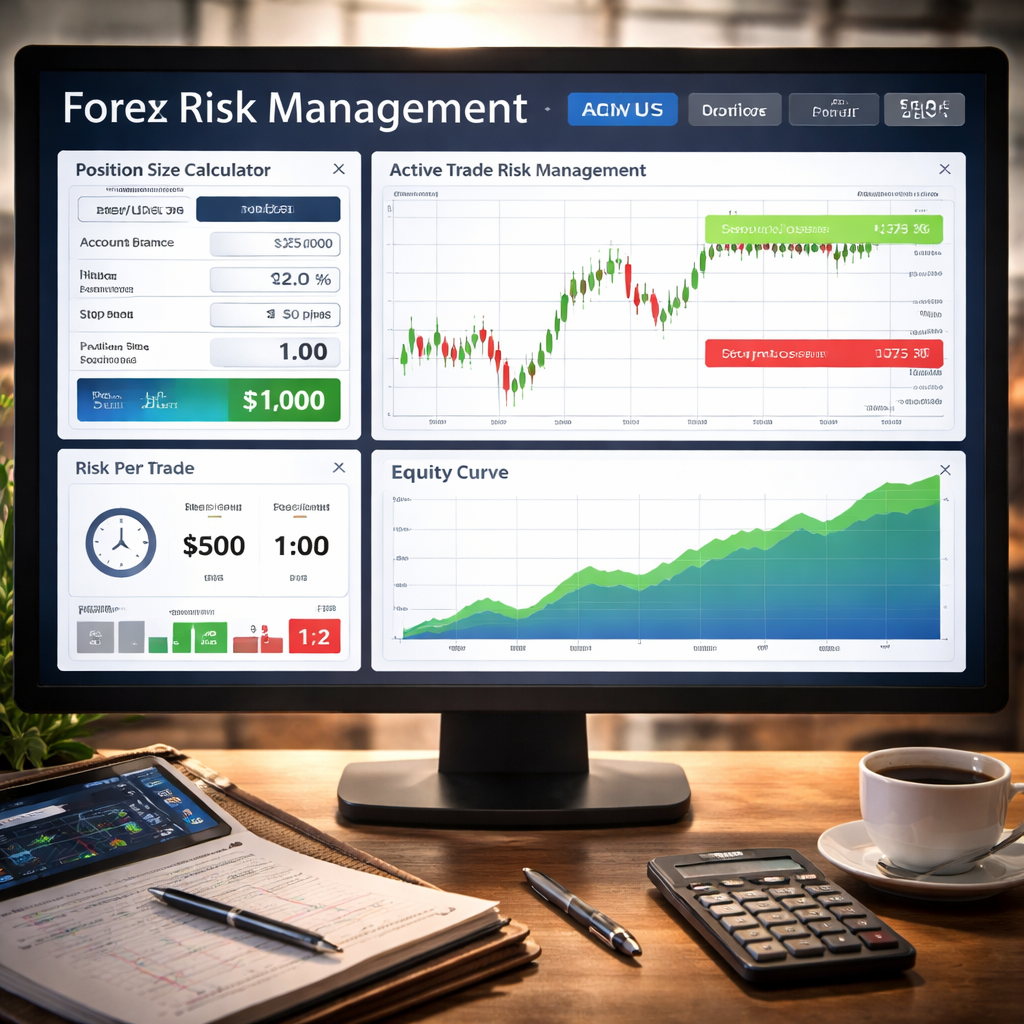
First rule: set a maximum percent of equity you’ll risk on any trade. A common number is 1%.
How to compute it? If your account is $10,000, 1% risk means $100 per trade.
Next, decide your stop‑loss distance. For a moving‑average crossover, you might place the stop a few pips below the recent swing low.
Here’s a simple function:
def calculate_position_size(equity, risk_percent, stop_distance, pip_value):
    risk_amount = equity * risk_percent
    size = risk_amount / (stop_distance * pip_value)
    return int(size)
Plug in your numbers. If stop_distance is 20 pips and pip_value for EUR/USD is $10 per standard lot, you’ll get a position size that caps loss at $100.
Second rule: use a risk‑reward ratio. Many traders aim for at least 1:2. That means for every $1 risked, the target profit is $2.
Third rule: limit total exposure. Even if each trade risks 1%, you don’t want ten trades open at once. Cap total open positions to, say, 5% of equity.
Fourth rule: add a trailing stop once the trade moves in your favor. A trailing stop locks in profit while letting the market run.
Read more about risk tools at IG’s risk management guide. And you’ll see practical examples of position sizing.
Pros of solid risk rules:
- Protects account from large drawdowns.
- Creates consistent risk per trade.
- Helps keep emotions in check.
Cons if you ignore them:
- One bad trade can wipe out many winners.
- Over‑leveraging leads to margin calls.
- Harder to stay disciplined.
And remember the key finding: Broker API has the highest count of key considerations (3), showing that integration details matter a lot for risk handling.
Wrap up your risk module by adding a check before each order. If the new trade would push total exposure over the limit, skip it.
That completes the risk side of this forex algorithmic trading basics tutorial.
Conclusion
We walked you through every step you need to start coding your own forex algo. First you learned how the market works and why market structure matters. Then we covered the core building blocks , programming, broker API, charting, signal generation and execution , and why latency is a big deal. Next you built a simple moving‑average crossover in Python, saw how to backtest it, and added solid risk rules to keep your capital safe.
Remember, the key findings tell you that programming and the execution module are the most critical parts. Focus on clean code and a fast broker connection. Keep testing, keep logging, and keep tweaking based on real data.
If you want more depth on each topic, check out Forex Trading Tutorial: From Beginner Concepts to Advanced Techniques. That guide expands on chart patterns, advanced risk models and how to move from a demo to a live account.
Start small, stay disciplined, and let your algo do the heavy lifting. Happy coding and safe trading.
FAQ
What is the first thing I should code in a forex algorithmic trading basics tutorial?
The first step is to set up a data feed and write a simple signal function. Pull recent price bars, compute a short moving average and a longer one, then compare them. This gives you a clear “buy” or “sell” flag that you can test quickly. Keep the code short so you can see if the signal works before adding complexity.
How do I choose the right broker API for my algo?
Look for an API that offers low latency, reliable data, and clear documentation. Interactive Brokers and Zerodha are popular choices. Test the ping time from your server to the broker; aim for under 1 ms if you plan to trade fast. Also check if the API lets you set stop‑loss and margin limits directly.
Can I backtest on a laptop or do I need a server?
You can backtest on a laptop as long as you have enough RAM to hold the data set. Use pandas to load CSV files of minute bars. For very large data sets or high‑frequency strategies, a VPS may help speed up the loops. The key is to keep the backtest logic identical to the live code.
What is a good risk‑reward ratio for a beginner?
Most educators suggest starting with 1:2. That means for every $1 you risk, you aim for $2 profit. This gives you a buffer if you win less than half of your trades. Adjust the ratio if you find your strategy wins more often or if market conditions change.
How often should I update my algo’s parameters?
Review performance every month. Look at win rate, average profit, and maximum drawdown. If the market has shifted , for example, volatility spikes , you may need to widen stop‑losses or change the moving‑average periods. Avoid changing parameters after every loss; that leads to over‑fitting.
Is it safe to run a forex algo on a demo account first?
Yes. A demo lets you see how the algo behaves with real‑time data but without risking money. Treat the demo like a live account: follow the same risk rules and log every trade. Once you see consistent results over a few weeks, you can consider moving to a small live account.
What tools can help me monitor latency?
Use a simple ping script that measures round‑trip time to the broker’s API endpoint. Log the time each signal takes to compute. If you see spikes above 10 ms, you may need to simplify the logic or upgrade your network. Some VPS providers offer built‑in latency monitors.
How do I handle news events that could cause slippage?
Set a news filter in your code. Pull an economic calendar feed and block new orders during high‑impact releases. You can also widen stop‑losses temporarily or switch to a “no‑trade” mode for the event window. This reduces the chance of a sudden price swing wiping out a position.