
Most traders jump in without a plan and lose fast. The data shows that only a handful of checklists stress the 1% risk rule, yet they also demand 50‑100 trades to prove a system. That gap can cost you real money.
In this guide you’ll learn how to build a solid personal forex trading system from goal setting to backtesting. We’ll walk through each step, give you practical tips, and show you why each piece matters.
| Component | Description | Key Parameter | Typical Range/Value | Best For | Source |
|---|---|---|---|---|---|
| Trade Volume Requirement | At least 50–100 trades per strategy. This reveals your system’s win rate, drawdown, and behavior in different conditions. | minimum number of trades | 50–100 trades per strategy | Best for data‑driven validation | acy.com |
| Kill Zone Time Window | The New York “Kill Zone” is the specific time window when the highest‑probability setups occur. | time window | 8:30 AM to 10:00 AM ET | Best for timing precision | medium.com |
| High R:R Ratio | Only take trades with a minimum 1:2 or 1:3 Risk-to-Reward ratio. | Risk-to-Reward ratio | minimum 1:2 or 1:3 | Best for reward optimization | medium.com |
| Partial Take Profits | Scale out of your position at key targets (e.g., 50% at 1:1 R:R) to secure profits. | take profit scaling | 50% at 1:1 R:R | Best for profit scaling | medium.com |
| Fixed Percentage Risk | Never risk more than 1% to 2% of your total account balance per trade. | risk per trade | 1% to 2% | Best for strict capital preservation | medium.com |
| Trading Risk Management | Risk management is the difference between a trader and a gambler. Without it, nothing else matters. | risk per trade | 1%–2% of your account | Best for flexible risk range | acy.com |
| Risk Management | Calculate position size using the 1% Rule to protect your equity. | 1% Rule | 1% | Best for simple rule‑of‑thumb | tmgm.com |
| Risk Control | The 1% Risk Rule is non‑negotiable for long‑term capital preservation. | 1% Risk Rule | 1% | Best for non‑negotiable risk | tmgm.com |
Step 1: Define Your Trading Goals and Style
Before you write any code or draw any chart, you need to know why you’re trading. A clear goal keeps you from chasing every shiny setup.
There are four main goal types: financial, technical, psychological, and risk‑management. Financial goals might be “grow $5,000 to $10,000 in a year”. Technical goals focus on mastering a pattern, like “spot 3‑bar reversal”. Psychological goals aim at steady emotions , no panic when the market spikes. Risk‑management goals set the loss limit, often the 1% rule.
Here’s a quick way to set them:
- Write a short sentence for each goal type.
- Make each goal measurable (e.g., “risk no more than 1% per trade”).
- Review them weekly and tweak if life changes.
Why does this matter for developing a personal forex trading system? Because every rule you later code will trace back to a goal. If you aim for a 30% annual return, your position‑sizing and stop‑loss logic must support that target.
Most beginners fail by focusing only on money. They set a goal like “be rich fast” and ignore the other three pillars. That leads to over‑trading, big losses, and burnout.
To avoid the trap, ask yourself:
- What is the realistic profit I can earn with my capital?
- How many hours can I spend analyzing charts each week?
- What level of drawdown can I emotionally tolerate?
Answering these helps you pick a style , scalping, day‑trading, swing, or position. Each style matches a different time commitment and risk appetite.
For a deeper dive on goal setting, see the guide on Forex Tester’s trading goals article. And for a visual explanation, watch the related YouTube video here.
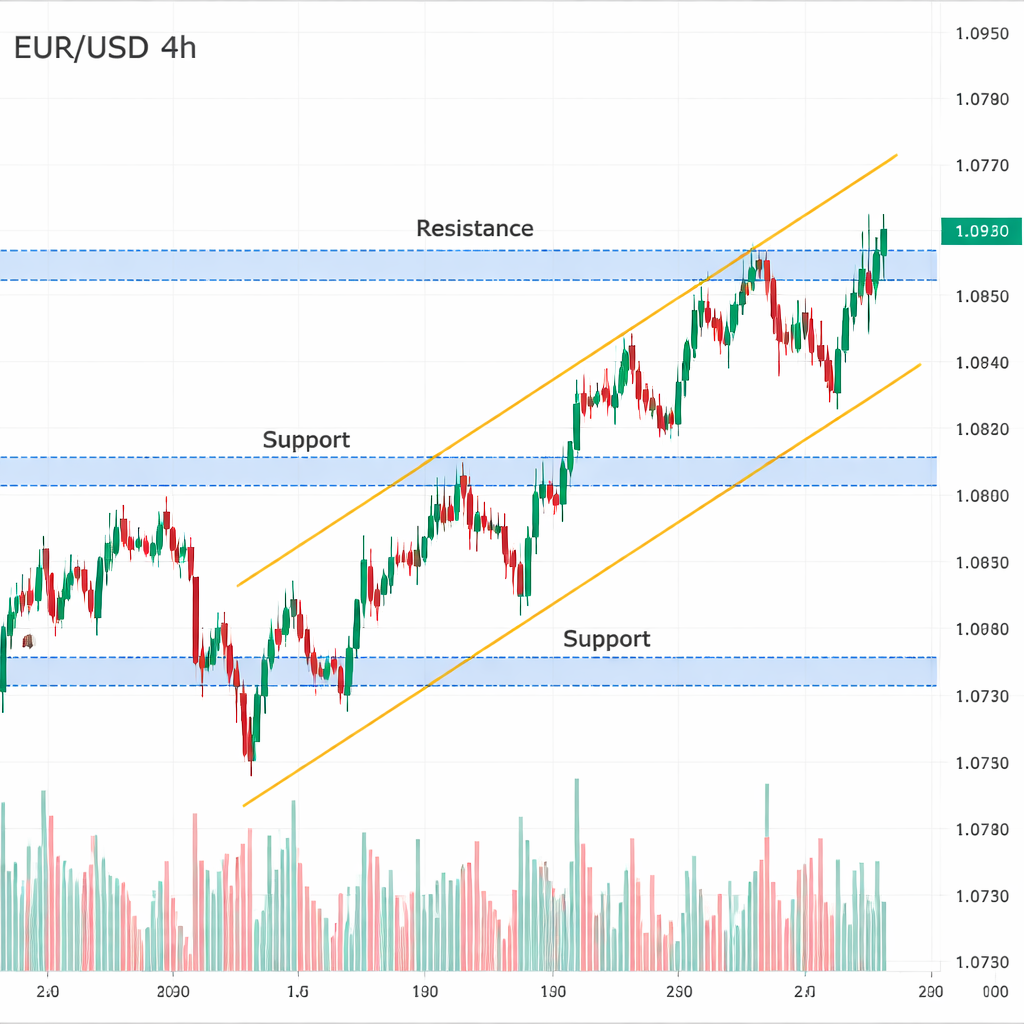
Step 2: Choose Your Market Instruments and Timeframes
Forex offers dozens of pairs, but not all suit every trader. Pick instruments that fit your capital, risk appetite, and the hours you can watch.
Major pairs like EUR/USD, GBP/USD, and USD/JPY are the most liquid. They move predictably and have tight spreads, which is great for low‑cost trading. Exotic pairs like USD/ZAR or USD/TRY have wider spreads and higher volatility , good for big‑risk players.
Next, decide on a timeframe. Your style drives this choice:
- Scalpers use 1‑minute to 5‑minute charts.
- Day traders prefer 15‑minute to 1‑hour.
- Swing traders look at 4‑hour to daily.
- Position traders stay on weekly or monthly.
Why does the timeframe matter for developing a personal forex trading system? Because the same entry rule can perform very differently on a 5‑minute chart versus a daily chart. You need to test each combo.
Here’s a step‑by‑step way to pick:
- List three pairs you like.
- Check their average daily range (ADR) on a 24‑hour chart.
- Match ADR to your risk tolerance , a 100‑pip ADR is easier to manage than 500‑pip.
- Choose a timeframe where the price action shows clear patterns (trend, range, breakout).
- Run a quick paper‑trade for a week to see how often you get clear signals.
For more detail on instrument traits, read FusionMarkets’ instrument guide. And for timeframe best‑practices, see IG’s timeframe article.
Step 3: Design Your Technical Analysis Framework
Technical analysis is the language of price. Your system’s rules will be built on patterns, indicators, and price‑action signals.
Start with the basics: identify trend direction, find support and resistance, then add a filter like a moving average or RSI.
Example framework:
- Trend: 200‑period SMA , price above = bullish, below = bearish.
- Entry: Look for a bullish engulfing candle on a 1‑hour chart when the 200‑SMA is up.
- Filter: RSI must be below 70 to avoid overbought conditions.
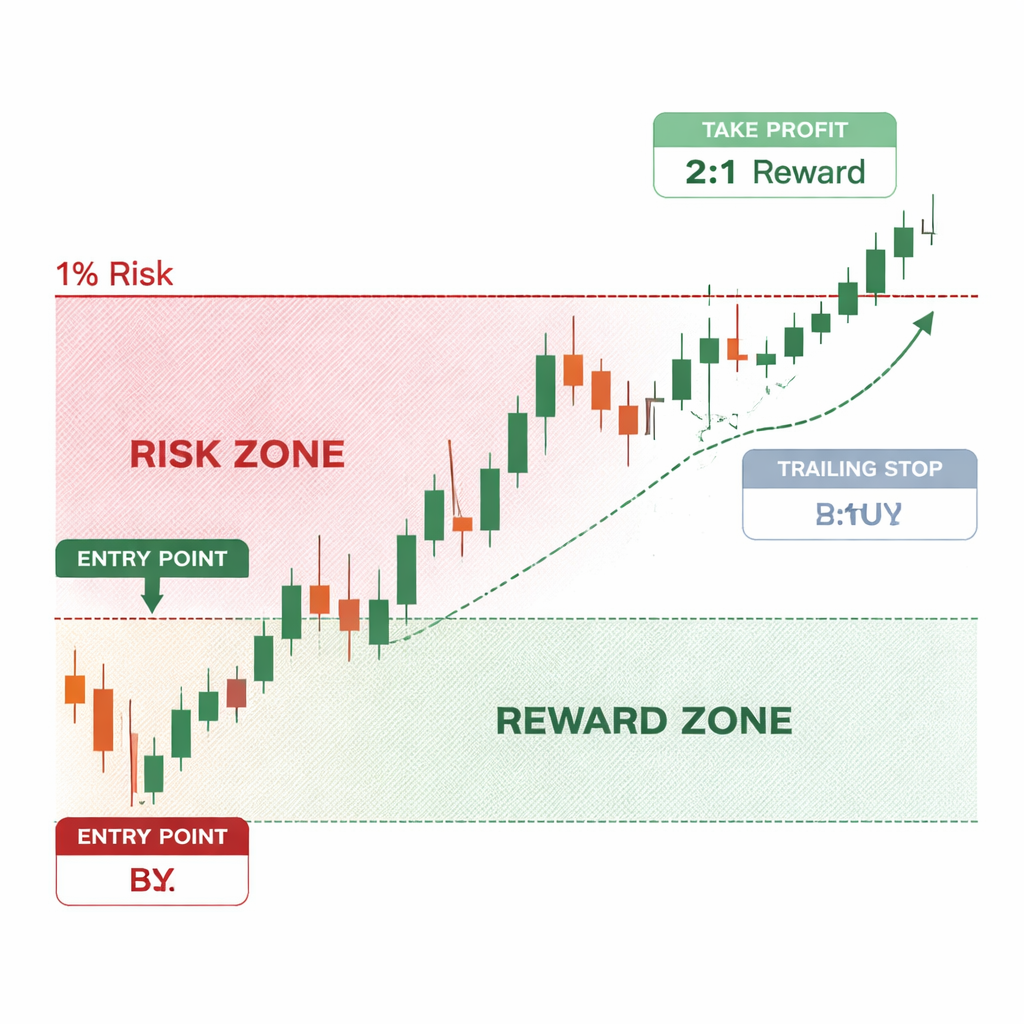
- Exit: Set a stop 1% below entry price and a target at a 2:1 risk‑reward.
Why combine these? The trend filter reduces false signals, the candle pattern gives timing, the RSI adds momentum context, and the stop/target give risk control.
Many traders add more layers , like MACD crossovers or Fibonacci retracements , but each extra rule cuts down the number of trades that meet all criteria. Remember the research table’s “Trade Volume Requirement” of 50‑100 trades. Too many filters can make it hard to hit that volume.
Here’s how to build the logic step‑by‑step:
- Pick a primary trend indicator (SMA, EMA, or ADX).
- Choose a clear entry pattern (engulfing, pin bar, or break of a trend line).
- Add a momentum filter (RSI, Stoch, or MACD).
- Define stop‑loss and take‑profit rules using the 1% risk rule.
- Write the rule set in plain English , this will be your pseudo‑code.
Testing each rule individually helps you see its win rate. Combine them later and watch the trade count drop.
Watch this short video for a visual walk‑through of building a simple EMA‑candle system:
For further reading on technical frameworks, see the article on Medium’s market‑structure deep‑dive and the guide on TMGM’s forex strategy basics.
Step 4: Build Your Risk Management Rules
Risk management is the single factor that separates traders who survive from those who quit.
The research shows that only two checklist items embed a strict 1% rule. That’s the rule you should start with.
Here’s a practical way to turn the 1% rule into a daily habit:
- Calculate your account equity at the start of each day.
- Multiply by 0.01 , that’s the max dollar loss you can take per trade.
- Use a position‑size calculator to turn that dollar loss into lots or mini‑lots based on your stop distance.
- Record the lot size in your trade journal before you enter.
- If the trade hits the stop, stop trading for the day , protect the remaining capital.
Next, set a risk‑reward minimum. The table lists a 1:2 or 1:3 ratio as best for reward optimization. Aim for at least 1:2 on every trade. If you can’t meet that, skip the trade.
Other rules to add:
- Maximum daily loss: 2% of equity. If you hit it, stop for the day.
- Maximum concurrent risk: 3% , don’t have more than three open trades each risking 1%.
- Trailing stop: move your stop to break‑even once the price moves 1.5R in your favor.
Why keep it simple? Complex rules make it hard to stick to the plan, especially when emotions run high.
For more on managing risk, read IG’s article on top risk‑management strategies. And the TMGM page on risk control offers a clear breakdown of the 1% risk rule here.
Step 5: Test and Refine Your System with Backtesting
Backtesting lets you see how your rules would have performed on real market data. Without it, you’re guessing.
Two main methods exist:
- Manual backtesting , scroll through historic charts and mark each trade.
- Automated backtesting , use software to run thousands of trades in seconds.
Both have pros and cons. Manual work builds intuition but is slow. Automated tools give speed but can hide data‑quality issues.
Here’s a quick checklist before you start:
- Choose a reliable data source , tick‑by‑tick data for the past 3‑5 years works well.
- Set the exact entry and exit rules you wrote in Step 3.
- Run the test on at least 100 trades across different market conditions (high volatility, low volatility, news days).
- Record key metrics: win rate, average R:R, max drawdown, profit factor.
- Compare the results against your goal set in Step 1.
If the system fails the 1% risk rule or the trade‑count requirement, tweak a rule and re‑test.
| Metric | What It Means | Good Range |
|---|---|---|
| Win Rate | Percent of trades that end in profit. | 30‑45% (if R:R ≥ 2:1) |
| Average R:R | Mean reward divided by mean risk. | ≥ 2.0 |
| Max Drawdown | Largest peak‑to‑trough loss. | ≤ 10% of equity |
| Profit Factor | Total profit ÷ total loss. | ≥ 1.5 |
ThinkMarkets offers a free backtesting tool called Traders Gym. It simulates real‑time market replay, lets you run up to 50 scenarios at once, and records every trade automatically. For a hands‑on look, read their guide here. The same site also explains why backtesting is essential.
After you finish a round of testing, ask yourself:
- Did the system meet the 1% risk rule?
- Did I get at least 50‑100 trades?
- Was the profit factor above 1.5?
If the answers are yes, you’re ready for a demo account. If not, go back to Step 3, adjust the entry filter or stop distance, and test again.
Conclusion
Building a personal forex trading system is a step‑by‑step process. You start by defining clear, measurable goals, then pick the right pairs and timeframes that match your style. Next you craft a technical framework that filters out noise, and you lock it in with solid risk‑management rules , the 1% rule, a minimum 1:2 risk‑reward, and daily loss caps. Finally, you put the system through rigorous backtesting to see if it survives real‑world market twists.
When each piece works together, you have a system that isn’t just a collection of random ideas. It’s a repeatable process you can trust. Keep a journal, revisit your goals often, and stay disciplined. If you follow this guide, you’ll be well on your way to developing a personal forex trading system that can grow with you in 2026 and beyond.
FAQ
What is the first step in developing a personal forex trading system?
The first step is to define your trading goals and style. Write down financial, technical, psychological, and risk‑management goals. Make them specific, measurable, and realistic. This foundation tells you how much risk you can take and which trading style , scalping, day, swing, or position , fits your life.
How do I choose the right market instruments for my system?
Start with the major currency pairs because they have the tightest spreads and most data. Check each pair’s average daily range and match it to your risk tolerance. Then pick a timeframe that aligns with your chosen style , short frames for scalpers, longer frames for swing traders. Test a few pairs for a week to see where you get clear signals.
What technical tools should I include when designing the framework?
Use a trend filter like a 200‑period SMA, an entry pattern such as a bullish engulfing candle, and a momentum filter like RSI below 70. Add clear stop‑loss and take‑profit rules based on the 1% risk rule and a minimum 1:2 risk‑reward. Keep the rule set simple enough to generate at least 50‑100 trades for validation.
Why is the 1% risk rule so important?
The 1% rule caps your loss on any single trade to 1% of your account equity. This protects you from big drawdowns and lets you stay in the market long enough to let good ideas work. It’s the core of the risk‑management checklist and the most reliable way to preserve capital.
How many trades should I aim for during backtesting?
Aim for at least 100 trades spread over 12‑24 months. This sample size reduces randomness and lets you see how the system behaves in different market conditions , news days, low‑vol periods, and trending phases.
What metrics tell me if my system is ready for live trading?
Look for a win rate of 30‑45% if you keep a risk‑reward of 2:1 or higher, an average R:R of at least 2.0, a max drawdown under 10% of equity, and a profit factor above 1.5. If those numbers meet the goals you set in Step 1, you’re ready to move to a demo account.
Should I adjust my system after I start live trading?
Yes. Keep a trading journal and review each trade against your original rules. If you notice repeated slippage, missed stops, or emotional overrides, tweak the rule that’s causing the breach. Continuous improvement keeps the system aligned with market changes.
Where can I find a template for a trading plan?
FXDoctor offers a free Forex Trading Plan Template that walks you through goal setting, instrument choice, technical rules, risk management, and backtesting steps. Use it as a checklist to keep your system organized.